🤖 VEX Onshape Assembly Builder
Learn to build virtual VEX robots like digital LEGO!
1 Getting Started with Onshape
What is Onshape?
Onshape is a FREE online CAD (Computer-Aided Design) program that lets you build 3D models right in your web browser. Think of it as a virtual workshop where you can design anything!
Why Onshape for VEX? You can test your robot designs before building them in real life, saving time and parts!
Log In to Your Account
Mr. Brossman has already created accounts for you! You don't need to sign up.
- Go to cad.onshape.com/signin
- Find your username and password in MS Teams
- Navigate to: Class Notebook → Unit 2 Mechanisms and Automation → Unit 2 Project Storage Bin
- Use your assigned username (like stem001@odlestem.com) and password
- Log in and you're ready to start!
2 Setting Up the VEX Library
Installing the VEX Library App
The VEX Library gives you access to every real VEX part you can use in your robot!
Image: appsOnshape.png
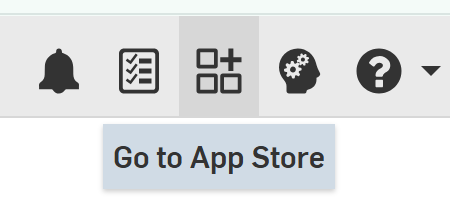
- Log into Onshape
- Click the App Store icon (9 squares) in the top right corner
- Search for "VEX Library"
- Click "Subscribe" (it's free!)
- Accept the permissions
3 Opening Your Assembly
Start a New Project
- Click the "Create" button (top left)
- Select "Document"
- Name it something like "My First VEX Robot"
- Click "OK"
Switch to the Assembly Tab
When Onshape creates a document, it automatically includes both a Part Studio and an Assembly.
- Look at the bottom of your screen - you'll see tabs
- You'll see two tabs: "Part Studio 1" and "Assembly 1"
- Click on the "Assembly 1" tab
- This is where you'll build your robot!
4 Adding VEX Parts to Your Robot
Opening the VEX Library
- Make sure you're in your Assembly tab
- Click the App Store icon (9 squares) in the top right
- Find and click "VEX Library"
- A panel will open on the right side with all the parts!
Browsing Parts
The VEX Library is organized into categories:
C-Channels, Angles, Bars
Motors, Wheels, Gears
Brain, Controllers, Batteries
Vision, Distance, Bumper
Screws, Nuts, Spacers
Cylinders, Tanks, Valves
Inserting Your First Part
- In the VEX Library panel, click on "Structure"
- Find a "2x25 C-Channel" (a common base piece)
- Click "Insert"
- The part will appear in your workspace!
5 Navigating the 3D Workspace
Essential Mouse Controls
Rotate View
Right-Click + Drag
Spin around your robot to see it from all angles
Pan View
Middle-Click + Drag
Move the view up, down, left, or right
Zoom
Scroll Wheel
Zoom in to see details or zoom out for the big picture
Fit View
Press "F"
Centers everything on screen
6 Moving and Positioning Parts
Using the Move Tool
Right now, parts can move freely. Think of them as floating in space - like digital building blocks!
- Click on a part to select it (it will highlight in blue)
- Click the "Move" tool in the toolbar (or press "N")
- You'll see colorful arrows and circles appear
Understanding the Move Controls
Drag to move along X-axis
Drag to move along Y-axis
Drag to move along Z-axis
Drag to rotate around X-axis
Drag to rotate around Y-axis
Drag to rotate around Z-axis
7 Building Your First Robot Design
Start Simple - Build a Drive Base
Let's create a basic 4-wheel drive base! This is the foundation of most VEX robots.
Parts You'll Need:
- Two 2x25 C-Channels (for the sides)
- Four 4" Omni Wheels
- Two V5 Smart Motors (11W)
- One V5 Brain
- One Battery
Assembly Strategy
- Insert the first C-Channel - This is your base reference
- Add the second C-Channel - Move it parallel to create the frame width
- Add wheels - Position them at the corners
- Insert motors - Place them next to the wheels
- Add the brain - Position it in the center of your frame
- Add the battery - Place it where it balances your design
8 Visualizing Your Design
View Tools
Use these tools to see your robot from different perspectives:
Standard Views
Top, Front, Right, Isometric
Found in the ViewCube (corner of screen)
Display Styles
Shaded, Hidden Lines, Wireframe
Changes how parts look
Measure Tool
Check distances between parts
Make sure everything fits!
Section View
Cut through your robot
See inside the assembly
Taking Screenshots
Document your design process!
- Position your view to show your robot clearly
- Click the camera icon in the toolbar
- Choose "Capture Image"
- Save it to your portfolio or design journal
9 Organization and Best Practices
Naming Your Parts
As you add parts, they get automatic names like "Instance 1", "Instance 2". This gets confusing fast!
- Look at the left panel - you'll see all your parts listed
- Right-click on a part name
- Select "Rename"
- Give it a clear name like "Left Drive Motor" or "Front Right Wheel"
Using Folders
Group related parts together:
- Right-click in the parts list
- Select "Create folder"
- Name it (like "Drive System" or "Intake Mechanism")
- Drag parts into the folder
10 Challenge Projects
Beginner Challenges
- Simple Drive Base: Build a 4-wheel robot with motors and a brain
- Add an Intake: Design a front-mounted roller system
- Tower Builder: Create a vertical lift mechanism using c-channels
- Balanced Design: Arrange parts so weight is evenly distributed
Design Questions to Consider
As you build, think like an engineer:
- Where should the heavy parts (motors, brain, battery) go?
- How wide/long should my robot be to fit through spaces?
- Can I reach all the game elements I need to score?
- Is my design stable, or will it tip over?
- How will I power all my motors?
🎯 Quick Reference Guide
Common Shortcuts
❓ Troubleshooting
Common Issues
Problem: Can't find a part in the VEX Library
✓ Use the search bar - try different keywords like "wheel" vs "omni"
✓ Check if you're in the right category
Problem: Parts are overlapping or inside each other
✓ This is normal! Without mates, parts can pass through each other
✓ Use the Move tool to reposition them
Problem: Can't see my robot - everything disappeared
✓ Press "F" to fit everything on screen
✓ Check if you accidentally hid parts (right-click and select "Show")
Problem: Onshape is running slow
✓ Close other browser tabs
✓ Try using a different browser (Chrome works best)
✓ Check your internet connection
🚀 You're Ready to Build!
Remember: Design is an iterative process. Your first robot doesn't have to be perfect!
Experiment, make mistakes, and learn as you go. That's engineering!
After you're comfortable with adding and positioning parts, Mr. Brossman will teach you about:
- ⚙️ Mates - Connecting parts together properly
- 🎬 Animation - Making your robot move virtually
- 📊 Bill of Materials - Tracking what parts you need
- 🏗️ Building - Taking your design into the real world!